
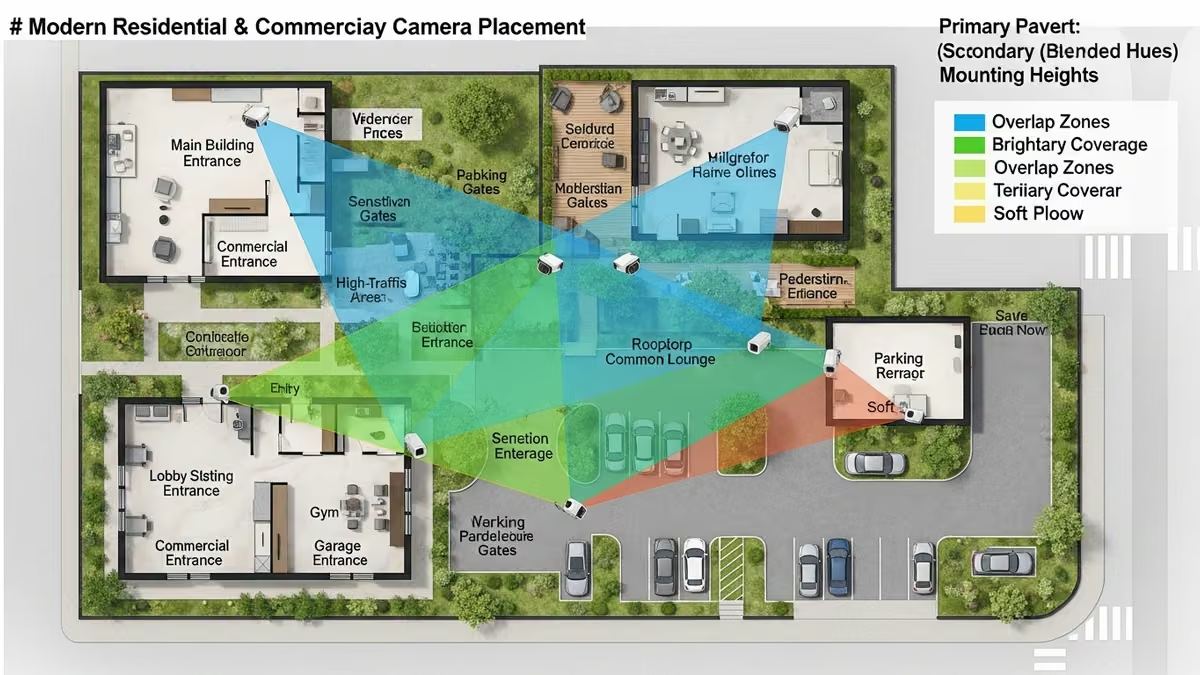
A solid security camera placement strategy is the foundation of any effective surveillance system. Yet many property owners—residential and commercial alike—install cameras reactively, without a clear plan. The result? Blind spots, wasted equipment, and false confidence in their security posture. This guide walks you through a proven approach to security camera placement strategy coverage that maximizes protection while controlling costs.
Why Security Camera Placement Strategy Matters More Than Camera Count
It’s tempting to think more cameras equal better security. In reality, strategic placement beats quantity every time. A well-positioned camera covering a critical entry point delivers far more value than three cameras pointed at empty walls.
The right security camera placement strategy accomplishes three things:
- Identifies vulnerabilities before they’re exploited
- Captures actionable footage that supports investigations and insurance claims
- Deters criminal activity through visible, strategic coverage
Without a clear strategy, you’re essentially guessing. And guessing leads to gaps—literally and figuratively.
Step 1: Conduct a Threat Analysis and Asset Identification
Before placing a single camera, understand what you’re protecting and from what threats. This foundational step shapes your entire coverage optimization approach.
For Residential Properties
Ask yourself:
- Which entry points are most vulnerable (front door, back door, garage, windows)?
- What valuables need protection (vehicles, outdoor equipment, landscaping)?
- Are there blind spots where someone could approach undetected?
- What’s the lighting situation at night?
For Commercial Properties
The analysis expands:
- Where is high-value inventory stored?
- Which areas require access control monitoring (server rooms, cash handling areas)?
- What’s your employee and visitor traffic pattern?
- Are there loading docks, parking areas, or perimeter zones that need surveillance?
- What compliance or insurance requirements apply?
Document your findings. This becomes your roadmap for camera placement commercial or residential applications.
Step 2: Map Traffic Flow and Identify Critical Zones
Understanding how people move through your space is essential to effective surveillance system design. Traffic flow mapping reveals convergence points—places where multiple pathways intersect—and these are prime camera locations.
Primary Zones (Must-Have Coverage)
- Entry and exit points: Front doors, side doors, garage entries, loading docks
- Perimeter: Driveway, walkways, fence lines, rooflines
- High-value areas: Safes, inventory storage, equipment racks, parking spaces
- Common areas: Lobbies, hallways, stairwells, elevators (commercial)
Secondary Zones (Nice-to-Have Coverage)
- Outdoor landscaping and grounds
- Interior corridors and break rooms
- Parking lots and vehicle areas
- Secondary exits
Prioritize primary zones first. Secondary zones can be added later as budget allows, which aligns with cost-effective camera installation principles.
Step 3: Strategic Exterior Camera Placement
Exterior cameras are your first line of defense. They deter criminals, capture approach footage, and provide context for any incident.
Entry and Exit Points
Position cameras to capture:
- Face-on view: Mount at 5–7 feet high, directly facing the door or gate
- Approach angle: Capture the path leading to the entry (10–15 feet back if space allows)
- Wide context: Include the surrounding area to show how someone arrived and what they carried
For residential homes, this typically means front door and back door cameras. For commercial buildings, include all personnel entrances, delivery areas, and emergency exits.
Perimeter Monitoring
Perimeter cameras create a “fence line” of coverage around your property. Position them to:
- Overlap slightly with adjacent cameras to eliminate blind spots
- Cover corners and edges where someone might hide
- Monitor driveways and vehicle approach routes
- Capture the full width of property lines
Mount at 8–10 feet high for optimal angle and weather protection. Ensure clear sightlines—trim branches, remove obstacles, and plan for seasonal changes.
Lighting Considerations
Poor lighting ruins footage quality. For exterior security camera placement strategy:
- Install cameras where existing lighting is adequate, or add dedicated lighting
- Avoid pointing cameras directly into light sources (creates glare and backlight)
- Consider infrared or low-light capable cameras for dark areas
- Test camera angles at night before finalizing installation
Step 4: Strategic Interior Camera Placement
Interior cameras protect assets, monitor employee activity, and provide evidence in disputes. However, privacy laws vary by jurisdiction, so placement must be thoughtful and compliant.
High-Value Areas
In commercial settings, prioritize:
- Server rooms and IT closets: Mount overhead for full room visibility
- Cash handling areas: Capture transactions from multiple angles
- Inventory storage: Monitor access and movement of goods
- Equipment rooms: Protect expensive machinery and tools
For residential homes, consider safes, jewelry storage, or valuable collections—though most homeowners prioritize exterior coverage.
Common Areas and Convergence Zones
These are high-traffic areas where multiple pathways meet:
- Lobbies and reception areas
- Hallways and corridors
- Stairwells and elevators
- Break rooms and common spaces
- Parking areas (interior or covered)
Mount cameras at 8–10 feet high in hallways and common areas. This height captures faces and body language while minimizing obstruction from people and furniture.
Privacy-Sensitive Areas
Never place cameras in bathrooms, locker rooms, changing areas, or private offices without explicit consent and legal review. These areas expose you to serious privacy violations and liability.
Step 5: Technical Considerations for Optimal Placement
Mounting Height and Angle
Camera height and angle directly impact footage quality and usability:
- Face capture: Mount at 5–7 feet for frontal facial recognition
- Body and gait: Mount at 8–10 feet to capture full body and walking patterns
- Wide area coverage: Mount at 10–12 feet for overhead views of large spaces
- Angle: Tilt 15–30 degrees downward for optimal facial capture without glare
Avoid extreme angles. A camera pointed straight down captures the top of heads; one pointed too high misses faces entirely.
Field of View and Lens Selection
Different lenses serve different purposes:
- Wide-angle (100–120°): Covers large areas but sacrifices detail; good for hallways and lobbies
- Standard (50–70°): Balanced coverage and detail; ideal for entry points and perimeter
- Narrow/telephoto (30–50°): Captures fine detail over distance; useful for identifying faces in large parking lots
Many modern systems use varifocal lenses that adjust on-site, offering flexibility without multiple camera types.
Environmental Factors
Your environment shapes camera selection and placement:
- Weather exposure: Use IP67-rated cameras for outdoor areas; ensure proper drainage around mounts
- Temperature extremes: Some cameras perform poorly in extreme heat or cold; verify specs
- Dust and debris: Industrial environments may require sealed or hardened cameras
- Vibration: Mount cameras on stable surfaces away from machinery or traffic
Step 6: Balancing Security and Privacy
Effective surveillance requires trust. Transparent policies and legal compliance protect both your property and your reputation.
Notification and Signage
Post clear signage indicating surveillance is in use. This:
- Deters criminal activity (visible cameras are powerful deterrents)
- Meets legal requirements in many jurisdictions
- Establishes consent and manages expectations for employees and visitors
Data Retention and Access
Establish clear policies:
- How long is footage retained (typically 30–90 days)?
- Who has access to recordings?
- How are recordings secured and encrypted?
- What’s the process for footage requests or legal discovery?
Consult legal counsel to ensure compliance with local privacy laws. Requirements vary significantly by jurisdiction.
Step 7: Implementation Best Practices
Phased Deployment Approach
You don’t need to install everything at once. A phased approach to cost-effective camera installation spreads costs and allows refinement:
- Phase 1: Install cameras at primary entry/exit points and high-value areas
- Phase 2: Add perimeter coverage and secondary exits
- Phase 3: Expand interior coverage to common areas
- Phase 4: Add specialized cameras (low-light, thermal, etc.) as needed
This approach lets you validate your surveillance system design before full commitment and adjust based on real-world performance.
Documentation and Mapping
Create a detailed map showing:
- Camera locations and model numbers
- Field of view and coverage areas
- Mounting heights and angles
- Cable routes and power connections
- Storage and backup locations
- Access credentials and system passwords
This documentation is invaluable for troubleshooting, expansion, and staff training. Update it whenever changes are made.
Testing and Validation
Before considering the job complete:
- Review footage from each camera in daylight and darkness
- Verify facial recognition quality at expected distances
- Test motion detection sensitivity and alert thresholds
- Confirm backup and storage systems are functioning
- Walk the property and identify any remaining blind spots
This validation step catches issues before they become problems.
Common Security Camera Placement Mistakes to Avoid
Learning from others’ errors accelerates your success. Here are the most common camera placement commercial and residential mistakes:
- Pointing cameras at walls or empty sky: Wastes coverage and provides no actionable footage
- Mounting too high or too low: Compromises facial recognition and detail capture
- Ignoring blind spots: Criminals exploit gaps between camera fields of view
- Poor lighting setup: Backlighting, glare, and darkness render footage useless
- Inadequate overlap: Adjacent cameras should overlap slightly to eliminate gaps
- Neglecting maintenance: Dirty lenses, loose mounts, and outdated firmware degrade performance
- Installing without a plan: Reactive placement wastes money and leaves vulnerabilities
- Ignoring privacy laws: Unauthorized surveillance creates legal liability
Professional Installation vs. DIY: When to Call an Expert
DIY camera installation can work for simple residential setups, but professional installation offers significant advantages—especially for commercial properties or complex systems.
When DIY Makes Sense
- Simple residential setup (1–2 cameras)
- Straightforward mounting locations with good power access
- Wireless systems with cloud storage
- Budget is the primary constraint
When Professional Installation Is Worth It
- Commercial properties or multi-building sites
- Complex wiring, networking, or integration requirements
- Systems with 5+ cameras or specialized equipment
- Compliance or insurance requirements
- Need for ongoing support and maintenance
- Desire for optimized placement and system design
Professional installers bring expertise in surveillance system design, local code compliance, and equipment selection. They also handle the technical complexity of networking, storage, and integration—saving you time and preventing costly mistakes.
At Yanke Digital, we specialize in custom security camera design and installation for residential, multi-dwelling, and commercial properties across Saskatchewan. We conduct thorough threat assessments, design systems tailored to your specific needs, and handle professional installation with ongoing support.
Integrating Cameras Into a Complete Smart Security System
Modern security extends beyond cameras. A comprehensive approach integrates surveillance with access control, alarms, and environmental monitoring.
Consider how cameras work alongside:
- Smart locks and access control: Correlate camera footage with door access logs to identify unauthorized entry
- Security systems and alarms: Trigger camera recording and alerts when motion or intrusion is detected
- Intercoms and smart doorbells: Verify visitor identity before granting access
- Environmental sensors: Combine video with flood detection, temperature monitoring, and air quality data
Integrated systems provide context and reduce false alarms. Yanke Digital’s smart home solutions unify these components into one intelligent ecosystem, simplifying management and improving response times.
Security Camera Placement Strategy: Key Takeaways
A thoughtful security camera placement strategy is the difference between a surveillance system that works and one that merely exists. Here’s what matters:
- Start with analysis: Understand your threats and assets before placing cameras
- Prioritize strategically: Cover entry points, high-value areas, and convergence zones first
- Get the technical details right: Height, angle, lighting, and lens selection directly impact usability
- Plan for integration: Cameras work best as part of a complete security ecosystem
- Respect privacy: Transparent policies and legal compliance build trust and protect you
- Test and validate: Verify coverage and quality before considering the job complete
- Consider professional help: For complex systems, expert design and installation pay for themselves
Whether you’re protecting a residential home, apartment building, or commercial facility, the principles remain the same: thoughtful placement, quality equipment, and professional integration deliver security that actually works.
Ready to Optimize Your Security Camera System?
If you’re in Saskatchewan and ready to implement a professional security camera placement strategy tailored to your property, Yanke Digital is here to help. We design custom surveillance systems that maximize coverage while controlling costs, then handle expert installation and ongoing support.
Contact us today for a free consultation. We’ll assess your property, identify vulnerabilities, and design a system that gives you real peace of mind.
📞 Call 1-888-698-8001 or visit yankedigital.com to get started.